Tuesday, December 18, 2007

Review: Klean Kanteen and SIGG Water Bottles


Kleen Kanteen and SIGG water bottles are my first choice water bottles. I used plastic bottles for years but the taste of plastic and reading made me change out my water bottles. Both brands have sizes that fit in most drink holders.

The SIGG bottles are a bit lighter than the Kleen Kanteen bottles since they are enamel coated aluminum but shouldn't be frozen or put into a dish washer. The Kleen Kanteen bottles are stainless steal, toxic free, dishwasher safe and can be used with hot and cold liquids. The Kleen Kanteen bottles are a bit noisy to open since they are stainless cap and a stainless bottle. The SIGG bottles have a plastic top which is much quieter. SIGG bottles have nice pretty designs which appeal to some people. If you like the stainless look then the Kleen Kanteen bottles will appeal to you.

Both water bottles are great bottles. Each has some advantages over the other but both are light and taste free. When backpacking I'd prefer to use SIGG, but day to day I prefer the Kleen Kanteen bottles since they can be cleaned in a dish washer and can handle any liquid you can put in it.


Tuesday, December 11, 2007

Review: Kinesys Performance Sunscreen


Kinesys Performance Sunscreen is my preferred sunscreen when outdoors, and I'm outdoors a lot when photographing. It spreads evenly on your skin and doesn't feel heavy like other sunscreens. Since it's not oil based I can put it on my face and use my camera and not get the back of the camera greasy. I prefer the fragrance-free version above, but if you like fragrance in your sunscreen there are colored bottles that have smells you may like.

When the Missus and I went to Costa Rica we used nothing but this sunscreen, applied it multiple times a day and didn't get one burn. The reason this is so impressive is that Costa Rica was so hot and humid and the sunscreen stayed on and worked. It truely is water and sweat resistant.

Friday, November 30, 2007

Review: Solomon Shoes


I ran across the Solomon shoes on one of my many trips to REI and tried them on just for kicks because of the cool looking laces. From that moment I was hooked. I've always known Solomon as a winter ski equipment company. Who knew they could make a darn good shoe. The best part about them is the laces. The best part about any of the Solomon shoes with these snazzy laces is they just work and work perfectly every time. No more retying your laces to get them just snug enough two minutes into your run. With marketing terms like quickfit, asymmetrical lacing and sensifit how could you go wrong. I have to admit that ever since those velcro shoes came out in the 80's and then the self tying shoes in Back To The Future I've been hooked on easy to lace shoes, and these are the best I've come across yet. I own the cheapest pair of running shoes they make and the aquatic amphibian shoes and love both of them. From what I can tell after looking at the Solomon website the aquatic shoes are being discontinued. Solomon has a low end running shoe and some higher more pricey gor-tex models. I find that the gor-tex shoes don't fit my foot so I stick with the cheap ones.

Review: Patagonia Down Jacket


We have a Patagonia outlet here in Santa Cruz and every year they have some amazing sales. A few years back I picked up the Patagonia down jacket in yellow and I absolutely love it. I shopped around for the best down jacket and by far I liked the Patagonia the best. Not only is the color totally swanky (they don't make the yellow anymore which is a bummer), but the feel of the fabric is awesome. The stuff sack that comes with it fits nicely in an inside zippered pocket. Some down jackets have a reversible inside pocket that doubles as a stuff sack. The Missus has one like this. While it means you can't loose the stuff sack it sure makes it a lot more difficult to stuff. I've used mine in sub zero degree weather and it kept me nice and toasty. There isn't really anything else to say about a down jacket other than I highly recommend it.

Thursday, November 29, 2007

Epson Printer Compatibility with Leopard

A while back I talked about why I'm not upgrading to Leopard just yet and one of the big road blocks for me is the lack of printer support. Epson announced today via a FAQ that can be read here that they will be releasing a driver for most of the Epson professional printers including my Epson 4800. You can download a beta of the driver here. That's great news but I have a few friends that have the very expensive Epson 7600 that will not get an updated driver. I'm surprised at Epson considering how much one of these printers cost. I'll think twice the next time I recommend an Epson printer to anyone. Considering the fact that I've had two Epson 2200 printers die and my 4800 has firewire problems I'll think twice about buying another Epson myself. I continue hear great things about the latest generation of HP and Canon printers.

Monday, November 26, 2007

Review: Petzl Zipka LED Headlamp


I purchased the Petzl Zipka LED Headlamp earlier in the year and wish I had bought it sooner. My old headlamp is one of the first generation LED headlamps. It was great then, but it doesn't even compare to what is out there now.

Powered by three AAA batteries the Zipka is tiny. It fits in any pocket or pouch and it is really bright. I've been hesitant to replace my old headlamp because it takes only two AA batteries and I like all my gear, especially backpacking gear, to use AA batteries so I only need to carry one backup set. But now I've changed how I think about this. I've decided to just bring an extra Zipka headlamp for the group because I've had headlamps fail not just the batteries. I've been watching the headlamps for some time now and they all have gone to AAA batteries, so I figured I'd give it a try.

I thought the the retractable mini-band was silly at first. The Missus put it on and the first thing she commented on is it didn't pull her hair. So for people with long hair, this might just be the headlamp for you. I personally like how the retractable mini-band will fit around almost anything; put it on your head, helmet, arm, pack or wherever you need some light. I found it can hang from the inside of the tent providing enough light for the entire tent.

Petzl fixed two of the problems with the previous version; it is now water-resistant and has a button to choose between 4 different modes; high, medium, low, strobe. You can also buy a colored lens kit for star gazing where you require a red lens. I haven't tried swapping out lenses yet. They say it's easy but I don't want to break anything.

So for any outdoors person I highly recommend the Petzl Zipka LED Headlamp, and that you buy it from Amazon because they seem to have the best price.

Saturday, November 24, 2007

The Other Equipment

Often times I find the equipment that isn't photographic gear goes unrecognized so I figured I'd write a few posts over the next couple weeks reviewing the gear that I use that helps me take pictures but isn't picture taking equipment. Since Christmas is just around the corner this seems very fitting. Especially since photography equipment no matter how small can have a very high price tag. Many of these items are perfect gifts for any outdoor photographer.

Petzl Zipka LED Headlamp
Patagonia Down Jacket
Solomon Shoes
Kinesys Performance Sunscreen
Kleen Kanteen and SIGG Water Bottles

Monday, November 19, 2007

Field Guide 101: Graduated Neutral-Density Filter


Tuolumne Meadows
Yosemite National Park, 2005


Graduated neutral-density filters allow you to control contrast between two elements of a photograph. Typically this is a forground and background like the photo above. There are a few choices of filter types. I find the one-stop filter to be pointless since there are typically two to three stops difference between foreground and background. For this reason I only carry the two-stop and three-stop soft-edged graduated filters.

When I first started using graduated filters I bought a filter holder and adapters for the different sized lenses I own. I now just hold the filter in front of the lens by the sides. This approach is faster to put the graduated filter in place, easier to adjust the filter and when the light is changing I can swap filters in a flash. Remember to use the graduated filter you need to remove the lens hood.

Using graduated filters can be difficult with gloves so I wear a thin set of glove liners for colder conditions such as when I took the photo above at Tuolumne Meadows after the first snow. I have been toying around with creating the same effect as graduated filters in post processing but I haven't come to a conclusion which produces higher quality photos. There definitely are situations with tree lines where it isn't worth doing in post processing, so Photoshop hasn't completely replaced filters.

Tuesday, November 13, 2007

Review: Nikon Snap-On Lens Cap


A few years back I was shooting with some Nikon users and noticed that most of them had the slickest lens caps I'd ever seen. These are the Nikon Snap-On Lens Caps. I borrowed one for a few hours and when I got home immediately placed an order for one to test more.

Not only do they have the standard tabs on the edges to release the lens cap, but they also have a larger set right in the middle of the cap. This means that when you go to put on the lens cap or remove it you won’t bump your oily little fingers on the lens element (or filter if you use that sort of thing). The additional tabs also make it easier for larger hand folks to get in there with the lens hood on to remove or apply the lens cap. Also those larger additional tabs make it easier for when you are wearing gloves in cold weather.

I love these lens caps and over time have been replacing my lens caps on my most used lenses with these awesome little lens caps. I typically use B&H Photo to buy camera equipment but I found Amazon to be a little less expensive. So here are some quick links to the 58mm, 67mm, 72mm and 77mm Nikon Snap-On Lens Caps at Amazon.

Monday, November 12, 2007

Photoshelter Collection


Autumn Road
Eastern Sierra, 2005


Photoshelter Collection went live this morning. I submitted 200 photos of which about 181 were accepted 10 of which are editors choice. You can see my photos here. It should be an interesting experience. I wish Photoshelter the best of luck in a very interesting market.

Wednesday, November 7, 2007

Field Guide 101: Clos-ups with Extension Tubes


Monarch butterfly, Danaus plexippus
Natural Bridges State Park, 2007


Sometime in October of every year the Monarch Butterflies start arriving in Santa Cruz at Natural Bridges State Park, the Monarch Butterfly Natural Preserve, and feed upon the abundant Milkweed plants in the area. They don't start to cluster in the groups until later in the year at which point they will reproduce and die. This yearly cycle creates an endless source of photographic opportunities, the most obvious being macro photography.

I own the excellent Canon 100mm macro lens but it doesn't have the working distance often required for such skittish creatures. When working with butterflies you have two choices: Wait for one to land within your photographic reach or watch for one landing and sneak up on it. I use both approaches. When I'm waiting typically I'm using a tripod and a very large lens as was the case with the photo above. It was taken early in the season just as the Monarchs arrived in town. I used a 500mm lens with a 1.4x extender to get an effective focal length of 700mm on a Canon 5D. I then turned this 700mm lens into a super macro lens by adding a 20mm extension tube. The extension tube reduces the minimum focal distance so I can maintain a working nice working distance but get close enough to fill the frame with a butterfly.

Kenko Extension Tube Set


An extension tube is simply a tube with lens mounts on either side that mounts between the lens and camera and is designed to move the lens farther from the film or sensor. By moving the lens farther away from the film or sensor the focus distance is reduced effectively turning the lens into a macro lens. Actually the focus plane of the entire lens is moved closer so not only is the minimum focus distance less, but the lens can also no longer focus to infinity. The longer the extension tube the closer the minimum focus distance becomes. Extension tubes are just a tube with no optical elements so the quality of light is not degraded but the amount of light is reduced. Most extension tubes sold today have electronic contacts so the lens can auto focus but the loss of light may make auto focus difficult in low light conditions. Usually the light loss is a stop or two.

When I'm not patient enough to play the wait game I put a 20mm extension tube on my Canon 100-400mm or 70-200mm lens and use my Canon 1D Mark II for it's increased auto focus performance when at f/8.

I personally prefer to use extension tubes on a telephoto lens as opposed to a dedicated macro lens such as the Canon 100mm or 180mm for three reasons:

1. None of the macro lenses have Image Stabilization.
2. I prefer to have a general purpose lens in my bag that can be used for more than just macro work. This is really important when traveling or hiking when weight really matters.
3. The macro lenses are slow to auto focus and when working with small critters you need all the speed you can get.

When I was staring out I wanted to shoot small things and asked a friend what to get and he suggested extension tubes. I went out and bought the Canon 100mm macro lens because it seemed to be more of what I wanted. Looking back, I wished I had bought something like the Canon 70-200mm f/4 and some extension tubes. This would cost a bit more but there are many more photographic possibilities with this equipment.


Tuesday, November 6, 2007

I'm not Upgrading to Leopard Just Yet

You'll never see me first in line to upgrade my OS. I only upgrade once all critical applications work. Within the first few days I got a call from a friend who bought a new MacPro and couldn't get his Epson 7600 printer working with Leopard. Epson has enough printer driver issues without having problems with the OS. But I know of a number of other people having printer problems so I'm pretty sure there is a problem with Leopard. I also use Aperture and people have been having a lot of small but annoying problems. There are also problems with Adobe products. I'll just wait until the kinks are ironed out. I'll let other people be the guinea pigs. I'm on the forefront of too many other things.

You can read more about Leopard compatibility issues here.

Honestly though, I'm surprised how well Leopard does work right out of the box. I'd say this is a about as bug free of an OS release that I've seen.

Monday, October 22, 2007

Photography Values & Ethics


Bison Sunset, Bison bison
Yellowstone National Park, 2006


From doing shows I have found that people like to know that there are wild places still out there somewhere. That these wild places do still exist. It seems to give them comfort. Some people ask, "is this real?" What they are really asking is "did you use Photoshop?" My short answer is always "yes". Nearly everyone printing photos today uses Photoshop. My slightly longer answer is "my photographs are true to real life."

For some people modify in camera is fine but modify post production is not fair game. Photography is pure art. It is all interpretation. Each person's eye sees something different. There is not just one kind of photography or approach to photography. The whole question of image manipulation comes down to what you feel you want to convey with your photography. I once ran into a photographer who had a collection of animal eyes and sky’s that would be added to photographs to make something completely different. This seems like cheating, but it's one way of getting a great shot.

I photograph for fine art. In addition to fine art many of my wildlife photographs have editorial uses, which has a different set of ethics from fine art. Each photographer has their own set of ethics and each photographer needs to decide what their ethics are. Here is my list of ethics to assist you in coming up with your own list:


  • I have a strong view that my photographs should have some sense of veracity. I use Photoshop to make the colors and mood look the way I remember them. I want to invoke the same feeling I had when I took the photograph while keeping true to real life.

  • I don't add anything to my photographs.

  • I do clone out litter or power lines from landscapes but I try to take them without these elements if I can.

  • I do clone out sensor dust.

  • I do composite images to make panoramas.

Thursday, October 18, 2007

New 30-inch Monitor


Eizo is a company known for their high quality monitors and have just released the FlexScan SX3031W, a 30-inch monitor to compete with the 30-inch Apple, Dell, HP, Samsung and Gateway. It is claimed to reproduce 97% of the Adobe RGB color space which is cool. If memory serves (someone please correct me if I'm wrong) the Apple 30-inch can reproduce 96% of the Adobe RGB color space. Not much of a difference but a welcome feature.

One funny feature but was probably a freebee was the Eizo "Picture-By-Picture" feature. This allows two computers to use the one monitor so you get dual monitor from one 30-inch. I guess this is cool, but I personally prefer the lower price of the Apple and the firewire hub built in. All other specs seem to be virtually comperable. I'm sure they use the same LCD panel and the other difference is the backlight. The Eizo does give you a 5-year warranty compared to Apple's 1-year. But Considering the Apple is $1,799 vs the Eizo quoted $2,555, I'd take the Apple. Eizo could send me a test unit so I could compare against my Apple.

Canon Fall 2007 Rebates

Today Canon announced their fall rebates. There are a bunch of lenses available and the 580EX II Speedlightwith between $20 and $125 off. Go to B&H Photo for an instance rebate. This rebate runs from October 18th 2007 to January 12th 2008.

Canon also has a rebate program on the Canon XTi, EOS 40D, EOS 5D camera with a purchase of a either a PIXMA Pro9000 or Pro9500 printer if you buy them at the same time on the same reciept. This rebate runs from October 14th 2007 to January 12th 2008.

Tuesday, October 16, 2007

New Canon Lenses Shown at Photo Plus Expo

Since Photo Plus Expo is just around the corner the camera announcements are starting to show up. Yesterday Canon made such an announcement with this press release that they will be exhibiting two new lenses that are under development. The new lenses are a Canon EF200mm f/2L IS USM and EF800mm f/5.6L IS USM. The 200mm f/2.0 to replace the discontinued 200mm f/1.8 which was mourned by many photographers since it was one of the sharpest lenses Canon ever made. I'm sure the new 200mm will live up to its predecessor’s expectations but only testing will tell. The 800mm I’m sure will be larger than the 12lb 600mm, so I'm sure not many photographers will just carry this around casually. I wish they'd replace the outdated 100-400mm with a similar 200-400 f/4.0 like Nikon has.

Monday, September 24, 2007

Review: Canon Eye Extender EP-EX15

I had high hopes for the Canon Eye Extender EP-EX15. I used it on my Canon 5D for a few months but ended up removing it. It can be used on other cameras such as the Digital Rebel, 20D, 30D, or 40D. The EP-EX15 reduces viewfinder magnification by 30% with two small plastic lenses extending the eyepiece 5/8" from the camera body. This is useful for eyeglass wearers and people with large noses from touching the LCD on the camera body with their nose. It also reduces condensation or fogging.

I found the tunnel vision effect not very useful but for some people the extension would be very handy. Over time little skin particles will find themselves between the two lenses of the EP-EX15. It is a simple procedure to remove the two small screws, a piece of plastic, piece of metal and the two lenses to clean them. Be sure to remember the order everything came apart.

Thursday, September 20, 2007

New Hasselblad


Hasselblad just anounced the new H3D II, a new integrated medium format digital camera system available immediately. The new camera features a 3" LCD, lower noise with a CCD heatsink, Ultra-Focus and an optional GPS unit that places GPS coordinates in image EXIF information. The camera is available now in 22, 31 and 39MP models. If ultimate image quality is needed then this looks like the camera to have. I'd love to get my hands on a unit to review.

Wednesday, September 12, 2007

Extending Aperture 1.5 Online Seminar

Apple has an online seminar on extending Aperture. The 32 minute video looks at Applescript, Automator, export plug-ins and iLife intrgration.

Friday, July 13, 2007

Field Guide 101: Shooting Panoramas


Copyright © 2007 Chris Bensen. All rights reserved.


The above photo is a stitch of 8 frames that I took on a trip to Yellowstone National Park in February 2006. Yes, that is the dead of winter. I snowshoed and snow mobile all around the wonderful outdoor amusement park for the better part of two weeks and enjoyed every minute of the -40 below storms to 20 above crystal clear sky. This photo was taken at sunset while a really big storm came in and we had over an hour to get back to the west entrance. Try snowmobiling through a herd of Bison that have made camp on the middle of the road in -30 below temperatures trying to not bump into the big furry beasts. It was a blast!

When shooting panoramic shots use a tripod. This will allow you to keep the horizontal of your photo as you rotate your camera from side to side. Make sure the camera and tripod are level. Overlap each frame by half to allow for easy stitching. I always set my camera vertically so the panoramic shot has a lot of detail vertically.

Each shot should have the exact same exposure. Set your camera on manual exposure and manual focus. Don't change any settings. Set the white balance so it isn't on auto white balance. Avoid using a filter that doesn't apply to the entire frame such as a polarizer or graduated neutral-density filter. The trick is to get the tonal levels of each exposure exactly the same.

The best subjects for stitched panoramic photos is a subject that does not move. If anything is moving in the frame such as wind moving grass, trees or clouds, people walking, changing sky such as sunset or sunrise you might just want to take one nice photo and forget the panorama.

There are a lot of tools for making sure your camera is level and that the camera rotates from the center of the sensor to ensure limited distortion. Lots of software is available for stitching as well. These are all good tools for helping you make some terrific shots that were very difficult before digital.

Wednesday, July 4, 2007

Field Guide 101: Exposure - Depth of Field


Misty Morning
Yellowstone National Park, Wyoming 2006


Depth of field is something many beginning photographers struggle with. So first let us define depth of field so there is no confusion. Depth of field is the distance in front of and beyond the plane of focus. There is only one plane in the photograph that is in focus and there is apparent focus toward the camera and beyond the focus plane. Typically the subject will be the on the focus plane. Apparent focus means that more of the image appears to be in focus. For a more detailed description, including the math behind depth of field, visit Wikipedia, Depth of field.

The depth of field is determined by the f-stop. By increasing the f-stop you reduce the aperture diameter and increase the depth of field, which reduces the amount of light. Each stop up doubles the amount of light and reduces the depth of field. It is a good idea to memorize the whole f-stops: f/1.0, f/1.4, f/2, f/2.8, f/4, f/5.6, f/8, f/11, f/16, f/22. I found in the film days I used one-third stops but in the digital world for speed purposes I have now switched to one-half stops. The reason being that with film I needed to be more accurate with my exposure but with digital there is a little bit of fudge factor given the way you want to expose to the right. You still want to get a correct exposure; it’s just that with digital there is more room for error and correction later.

More about exposing to the right later.

Photographers use depth of field for effects like blurred background, known as bokeh, or trying to make the entire scene look as if it is in focus. For an example of an in focus scene take a look at the photo at the top of this article. I used f/16 to get the desired effect. I also was shooting at 45mm. The wider angle the lens the more apparent focus. For this reason, and slow shutter speeds with good tripod use, most landscape photographs appears to be entirely in focus. Telephoto lenses have the opposite problem; very shallow depth of field even at the widest of apertures. Macro lenses suffer from shallow depth of field in spades.

If you were writing a book at this point I would take a couple photos of a flowers illustrating what happens when you open up the f-stop or close it down. Instead I will leave this as an exercise for the reader to do. Use whatever lens you have, put the camera in aperture priority and take the same photo at each whole f-stop. Then go back to your computer and compare the results. If you have more than one lens, or a zoom lens do the same thing at various zoom levels until you understand how the f-stop affects your photograph.

Tuesday, July 3, 2007

Field Guide 101: Sensor Cleaning

Dust has plagued photographers since the beginning of time and digital photography is no different. The latest generation of cameras helps reduce the problem with sensor cleaning features but whenever you change the lens you increase the possibility of getting dust on your sensor. I suggest waiting to clean your sensor until it becomes a problem since it is easy to remove later with Photoshop. Once it becomes a problem then I clean my sensor. On some photo shoots I have cleaned my sensor each evening.

Disclaimer, clean your sensor at your own peril. I am not responsible for you damaging your sensor. Know that cleaning your sensor is not covered by your camera's warranty and by cleaning your sensor you can damage the sensor. Just proceed with caution. Whatever you do don't use compressed air. The water vapor that accompanies compressed air can cause some real problems. I do know of some very expensive compressed air systems, which guarantee no water vapor, but most of us don't own such a system or want to travel with it. You can send your camera in for servicing to have a professional clean the sensor if you aren't comfortable doing it yourself, but I haven't heard of many people having good results. With that disclaimer clearly posted, I have heard of some people damaging their sensors but I don't personally know anyone that has, so let's proceed.

When you are cleaning the sensor you are actually cleaning an infrared glass filter that sits on top of the actual sensor. The reason the manufacturer warns anyone about cleaning their own sensors is that if you scratch this filter it is a costly repair since the filter is attached to the actual sensor, so if you scratch it requires replacing the entire sensor module.

First, how I do it. Your documentation will explain exactly how to get your camera into sensor cleaning mode. I like to put my camera on a tripod while I clean it and sit in a char looking directly into the lens mount at head height with my cleaning tools on a desk or table near by.

There are many ways people clean their sensors, some are more affective and easier than others. The easiest option is bulb blower. Be sure to not touch the sensor with the blower tip. If you don't have steady hands you can rest the blower on the lens mount. I find this option easy but doesn't clean much dust off rather it just moves it around.

Another easy option is the Arctic Butterfly Sl 700. I use this and it works pretty well. This brush spins up to create static electricity attracting the dust particles on your sensor and works surprisingly well. Spin it up to clean it off again before putting it away or going in for another swipe.

One simple option but expensive is sensor brushes by Visible Dust. To use these brushes spray CO2 on the brush for 10 seconds the whip the sensor. Repeat as necessary. These brushes work great.

The last option for difficult to remove dust particles and I've also used quite a bit is the clean the actual sensor with cleaning solution. For this you''ll want to buy a sensor swab for the sized sensor you have:

First you want the right swab for the sensor you have:

1/3rd sized sensors found on 1D series cameras such as 1D, 1D Mark II or 1D Mark III: Type 1

APS sized sensors found on a Rebel, 50D, D40X, or D300: Type 2

Full framed sensors found on a 1Ds series camera, D3, D700, 5D, 5D Mark II: Type 3

Eclipse Cleaning Solution (which is methanol) by Photographic Solutions. The biggest problem is due to shipping regulations in the US it is impossible to order but fortunately my local camera shop keeps it in stock. The last thing you want is a loupe so you can see the sensor. This makes the difference between success and failure. The process is quite simple, put three drops of solution on the swab end, carefully wipe from across the sensor in one motion, turn the swab over and wipe back the other direction. The Eclipse Cleaning Solution will evaporate very quickly. Typically I take a quick shot of a blue sky at a f/22 checking for dust and repeat if the sensor isn't clean and you can use the loupe at any time to see if you need to do more cleaning. They say you can do it in one swipe, but it usually takes me two or three tries to get it clean.

You can find a lot of videos on You Tube about sensor cleaning. If you have never cleaned your Digital SLR then you might want to watch a few of them before you get the nerves up to stick stuff in your camera.

Monday, July 2, 2007

Field Guide 101: Exposure - Basic Exposure Theory


Natural Bridges Sunset
Natural Bridges State Park, Santa Cruz California 2006


One of the keys to photography is properly exposing the film or digital sensor. Since most people shoot digital now days because of the better performance over film, including myself, I'll focus on digital photography. Once you go digital it is very difficult to go back. I stopped using film in early 2007 when I purchased a Canon 5D digital body. The reason I used film for so long was my film body was much lighter than my digital body. The 5D changed all this for me and now I take my 5D on long hikes and backpacking where weight really matters.

Getting into photography today means you have many sophisticated automatic metering systems in your camera that can be taken for granted. Far too often photographers use the camera's automatic settings to determine proper exposure without any idea what the camera is doing. Even the most sophisticated system is fallible so the key is to learn how to use the automatic systems and learn how they work so you can expose photographs under difficult lighting conditions. So the first thing is for us to get started with a good understanding of exposure. We will be looking at manual, aperture priority, and time priority modes of the camera because they are all important in modern nature photography. But the number one thing to be aware of is you need to be in control of taking the photograph, not the camera. Even when using one of the priority modes the photographer needs to know how the camera will be exposing the scene. The priority modes are actually more important because you are letting the camera choose how to expose the scene.

I use Canon cameras so anything I write about will be geared toward that equipment. Nikon and other cameras have similar settings but you should refer to your owner’s manual for detailed usage.

For a good textbook definition of exposure head on over to Wikipedia's definition of exposure. Most textbooks also show a nice bell shaped curve where properly exposed film is exposed in the center. Let me just say this isn't exactly correct, and things have changed a bit with digital. Correct exposure has nothing to do with the exposure meter in your camera. The exposure meter is simply a tool to use for you to evaluate how the image will be exposed. Correct exposure is exposing the film or digital sensor exactly the way you want to expose it. In the digital world you can get more information in your RAW file if you expose to the right and adjust later in Photoshop. Don't blow out the highlights, unless you intend on blowing them out. You can see if the highlights are blown out by the flashing alert on most camera preview screens.


The goal here is to know exactly what you are capturing leaving nothing to chance. Once you gain a level of control over your camera and exposure where you know what will happen you have succeeded in controlling exposure. Sure you might bracket your exposure, you might take a number of different photographs from different angles, after all we are dealing with nature and often times if you wait a few minutes something happens and things get better. But once you can control the camera you have reached a new level of proficiency to build upon. Reaching this proficiency allows you to take advantage of new oportunities and to begin learning other new things.

Sunday, July 1, 2007

Welcome to the Photography Field Guide


Poison Dart Frog on Leaf, Dendrobates auratus
Corcovado National Park, Costa Rica 2005


Welcome to the Photography Field Guide. Here we will discuss and learn the techniques used to photograph nature with in-depth instructions on technical matters and useful advice and discussions that will help any photographer realize their creative potential.

I will guide you through shooting landscapes, wildlife portraits, close-ups, choosing equipment, locations, printmaking, business, equipment reviews and more. Everything a nature photographer does will be covered. There will be articles for all aspects of the trade. From beginners to professionals, from students to amateurs. We will have something for nearly every photographer.

So sit back, check back often, support the site and get ready to learn how to take better pictures of this beautiful planet.

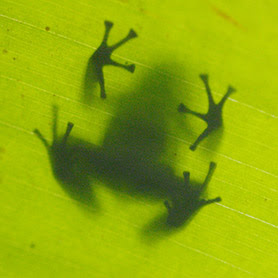
The green and black poison dart frog is found on the floor of rain forests. They are difficult to see however they make a chirp that is very noticeable. I took this photograph of a poison dart frog on a leaf on my visit to Costa Rica’s Corcovado National Park. I was lying in the mud of the jungle floor looking up into a giant leaf and way up above there was a small opening in the jungle canopy providing enough light to backlight a Poison Dart Frog. -Chris Bensen

Sunday, June 3, 2007

Hawaii Photographs Uploaded


Poison Dart Frog on Leaf, Dendrobates auratus
Corcovado National Park, Costa Rica 2005


I just completed uploading the 2004 Hawaii photographs to the Image Collection.

Sunday, May 6, 2007

Read About The Equipment I Use

I am frequently asked about the equipment I use to take my photographs, so I created a few pages about some of it that you can read about here.

Thursday, February 1, 2007

Government Center Exhibit Opening


Here is a small taste of what you will see if you go check out my exhibit at the government center. The show really does look better in person though. To find them just walk in the front door and start looking for them on your left. My photographs are all on the left side of the hall until the hall turns.

Wednesday, January 17, 2007

Government Center Exhibit

The month of February and March I will be showing at the Santa Cruz County Government Center. There will be a reception from 5pm-7pm on Friday February 2nd with snacks and beverages. If you are in the area please stop by.

Monday, January 15, 2007

Costa Rica Photographs Uploaded

I just completed uploading the 2005 Costa Rica expedition photographs to the Image Collection. Next I will be uploading the Yellowstone 2004 and our latest Yellowstone Winter 2006 expedition. If you want to see this show in person and are in the California Bay area, Yellowstone Winter will be showing all February and March 2007 at the Santa Cruz Government Center. View our events page for more details.

Saturday, January 13, 2007

Review: The Life of Mammals Nature Documentary


Recently I watched the four disk DVD series The Life of Mammals and I was very impressed by it’s quality, presentation and material. This has got to be the best nature documentary every produced. I it is that good. If you haven't seen it I highly recommend it you rent it from NetFlix or buy it. The cinema photography is simply stunning and the moments they capture of the animals is amazing.

Saturday, January 6, 2007

Website Overhaul

The website has been given a complete facelift and overhaul. More is on the way in the coming months and I will continue to update the main image and the image collection but a lot has changed so take a look around.

Since I have been asked many times at shows and through this website how I create my images I will be adding information and articles to give you insight into my process, equipment and technique for creating photos. So stay tuned and keep checking back here for more information.

Tuesday, January 2, 2007

Review: Canon Gadget Bag 10EG


Canon Deluxe Gadget Bag 10EG

I have been using this bag a lot lately. I can store one body, and 2-3 lenses in it. I know the literature states 2 SLR bodies and 5-8 lenses so they must be referring to the Rebel or 40D and 50mm or similar sized lenses. I typically carry the 5D with battery grip or 1D Mark II, 24-105mm f4.0 IS, 17-40mm and either the 100mm macro or 135mm F2.0. I can carry a larger lens such as the 70-200mm f2.8 and the 24-70 f2.8 but it the 70-200 can't be on the camera and it makes things a bit awkward. With three lenses typically I can't fit the camera in the bag with a lens on the body. I can put a Canon 580EX flash in the front pouch, a bunch of batteries and memory cards in one side pouch, and filters and other things in the other side pouch.

The exterior material is a nice high quality water repellent nylon and the interior is fully padded with a few Velcro dividers to arrange your equipment how you like. The shoulder strap is comfortable for a quite a long time. I don't personally have any need for the tripod holder since I'd prefer to just carry it in one hand but for some this might be a nice feature. I find the built-in waist belt not useful and it cannot be removed but at least there is a place to tuck the strap in out of the way.

Overall I say this bag is excellent value. I found it for $53.95 at Amazon which is lower than many of the other online stores I use.