Friday, July 13, 2007

Field Guide 101: Shooting Panoramas


Copyright © 2007 Chris Bensen. All rights reserved.


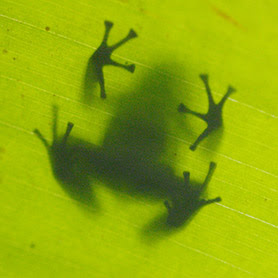
The above photo is a stitch of 8 frames that I took on a trip to Yellowstone National Park in February 2006. Yes, that is the dead of winter. I snowshoed and snow mobile all around the wonderful outdoor amusement park for the better part of two weeks and enjoyed every minute of the -40 below storms to 20 above crystal clear sky. This photo was taken at sunset while a really big storm came in and we had over an hour to get back to the west entrance. Try snowmobiling through a herd of Bison that have made camp on the middle of the road in -30 below temperatures trying to not bump into the big furry beasts. It was a blast!

When shooting panoramic shots use a tripod. This will allow you to keep the horizontal of your photo as you rotate your camera from side to side. Make sure the camera and tripod are level. Overlap each frame by half to allow for easy stitching. I always set my camera vertically so the panoramic shot has a lot of detail vertically.

Each shot should have the exact same exposure. Set your camera on manual exposure and manual focus. Don't change any settings. Set the white balance so it isn't on auto white balance. Avoid using a filter that doesn't apply to the entire frame such as a polarizer or graduated neutral-density filter. The trick is to get the tonal levels of each exposure exactly the same.

The best subjects for stitched panoramic photos is a subject that does not move. If anything is moving in the frame such as wind moving grass, trees or clouds, people walking, changing sky such as sunset or sunrise you might just want to take one nice photo and forget the panorama.

There are a lot of tools for making sure your camera is level and that the camera rotates from the center of the sensor to ensure limited distortion. Lots of software is available for stitching as well. These are all good tools for helping you make some terrific shots that were very difficult before digital.

Wednesday, July 4, 2007

Field Guide 101: Exposure - Depth of Field


Misty Morning
Yellowstone National Park, Wyoming 2006


Depth of field is something many beginning photographers struggle with. So first let us define depth of field so there is no confusion. Depth of field is the distance in front of and beyond the plane of focus. There is only one plane in the photograph that is in focus and there is apparent focus toward the camera and beyond the focus plane. Typically the subject will be the on the focus plane. Apparent focus means that more of the image appears to be in focus. For a more detailed description, including the math behind depth of field, visit Wikipedia, Depth of field.

The depth of field is determined by the f-stop. By increasing the f-stop you reduce the aperture diameter and increase the depth of field, which reduces the amount of light. Each stop up doubles the amount of light and reduces the depth of field. It is a good idea to memorize the whole f-stops: f/1.0, f/1.4, f/2, f/2.8, f/4, f/5.6, f/8, f/11, f/16, f/22. I found in the film days I used one-third stops but in the digital world for speed purposes I have now switched to one-half stops. The reason being that with film I needed to be more accurate with my exposure but with digital there is a little bit of fudge factor given the way you want to expose to the right. You still want to get a correct exposure; it’s just that with digital there is more room for error and correction later.

More about exposing to the right later.

Photographers use depth of field for effects like blurred background, known as bokeh, or trying to make the entire scene look as if it is in focus. For an example of an in focus scene take a look at the photo at the top of this article. I used f/16 to get the desired effect. I also was shooting at 45mm. The wider angle the lens the more apparent focus. For this reason, and slow shutter speeds with good tripod use, most landscape photographs appears to be entirely in focus. Telephoto lenses have the opposite problem; very shallow depth of field even at the widest of apertures. Macro lenses suffer from shallow depth of field in spades.

If you were writing a book at this point I would take a couple photos of a flowers illustrating what happens when you open up the f-stop or close it down. Instead I will leave this as an exercise for the reader to do. Use whatever lens you have, put the camera in aperture priority and take the same photo at each whole f-stop. Then go back to your computer and compare the results. If you have more than one lens, or a zoom lens do the same thing at various zoom levels until you understand how the f-stop affects your photograph.

Tuesday, July 3, 2007

Field Guide 101: Sensor Cleaning

Dust has plagued photographers since the beginning of time and digital photography is no different. The latest generation of cameras helps reduce the problem with sensor cleaning features but whenever you change the lens you increase the possibility of getting dust on your sensor. I suggest waiting to clean your sensor until it becomes a problem since it is easy to remove later with Photoshop. Once it becomes a problem then I clean my sensor. On some photo shoots I have cleaned my sensor each evening.

Disclaimer, clean your sensor at your own peril. I am not responsible for you damaging your sensor. Know that cleaning your sensor is not covered by your camera's warranty and by cleaning your sensor you can damage the sensor. Just proceed with caution. Whatever you do don't use compressed air. The water vapor that accompanies compressed air can cause some real problems. I do know of some very expensive compressed air systems, which guarantee no water vapor, but most of us don't own such a system or want to travel with it. You can send your camera in for servicing to have a professional clean the sensor if you aren't comfortable doing it yourself, but I haven't heard of many people having good results. With that disclaimer clearly posted, I have heard of some people damaging their sensors but I don't personally know anyone that has, so let's proceed.

When you are cleaning the sensor you are actually cleaning an infrared glass filter that sits on top of the actual sensor. The reason the manufacturer warns anyone about cleaning their own sensors is that if you scratch this filter it is a costly repair since the filter is attached to the actual sensor, so if you scratch it requires replacing the entire sensor module.

First, how I do it. Your documentation will explain exactly how to get your camera into sensor cleaning mode. I like to put my camera on a tripod while I clean it and sit in a char looking directly into the lens mount at head height with my cleaning tools on a desk or table near by.

There are many ways people clean their sensors, some are more affective and easier than others. The easiest option is bulb blower. Be sure to not touch the sensor with the blower tip. If you don't have steady hands you can rest the blower on the lens mount. I find this option easy but doesn't clean much dust off rather it just moves it around.

Another easy option is the Arctic Butterfly Sl 700. I use this and it works pretty well. This brush spins up to create static electricity attracting the dust particles on your sensor and works surprisingly well. Spin it up to clean it off again before putting it away or going in for another swipe.

One simple option but expensive is sensor brushes by Visible Dust. To use these brushes spray CO2 on the brush for 10 seconds the whip the sensor. Repeat as necessary. These brushes work great.

The last option for difficult to remove dust particles and I've also used quite a bit is the clean the actual sensor with cleaning solution. For this you''ll want to buy a sensor swab for the sized sensor you have:

First you want the right swab for the sensor you have:

1/3rd sized sensors found on 1D series cameras such as 1D, 1D Mark II or 1D Mark III: Type 1

APS sized sensors found on a Rebel, 50D, D40X, or D300: Type 2

Full framed sensors found on a 1Ds series camera, D3, D700, 5D, 5D Mark II: Type 3

Eclipse Cleaning Solution (which is methanol) by Photographic Solutions. The biggest problem is due to shipping regulations in the US it is impossible to order but fortunately my local camera shop keeps it in stock. The last thing you want is a loupe so you can see the sensor. This makes the difference between success and failure. The process is quite simple, put three drops of solution on the swab end, carefully wipe from across the sensor in one motion, turn the swab over and wipe back the other direction. The Eclipse Cleaning Solution will evaporate very quickly. Typically I take a quick shot of a blue sky at a f/22 checking for dust and repeat if the sensor isn't clean and you can use the loupe at any time to see if you need to do more cleaning. They say you can do it in one swipe, but it usually takes me two or three tries to get it clean.

You can find a lot of videos on You Tube about sensor cleaning. If you have never cleaned your Digital SLR then you might want to watch a few of them before you get the nerves up to stick stuff in your camera.

Monday, July 2, 2007

Field Guide 101: Exposure - Basic Exposure Theory


Natural Bridges Sunset
Natural Bridges State Park, Santa Cruz California 2006


One of the keys to photography is properly exposing the film or digital sensor. Since most people shoot digital now days because of the better performance over film, including myself, I'll focus on digital photography. Once you go digital it is very difficult to go back. I stopped using film in early 2007 when I purchased a Canon 5D digital body. The reason I used film for so long was my film body was much lighter than my digital body. The 5D changed all this for me and now I take my 5D on long hikes and backpacking where weight really matters.

Getting into photography today means you have many sophisticated automatic metering systems in your camera that can be taken for granted. Far too often photographers use the camera's automatic settings to determine proper exposure without any idea what the camera is doing. Even the most sophisticated system is fallible so the key is to learn how to use the automatic systems and learn how they work so you can expose photographs under difficult lighting conditions. So the first thing is for us to get started with a good understanding of exposure. We will be looking at manual, aperture priority, and time priority modes of the camera because they are all important in modern nature photography. But the number one thing to be aware of is you need to be in control of taking the photograph, not the camera. Even when using one of the priority modes the photographer needs to know how the camera will be exposing the scene. The priority modes are actually more important because you are letting the camera choose how to expose the scene.

I use Canon cameras so anything I write about will be geared toward that equipment. Nikon and other cameras have similar settings but you should refer to your owner’s manual for detailed usage.

For a good textbook definition of exposure head on over to Wikipedia's definition of exposure. Most textbooks also show a nice bell shaped curve where properly exposed film is exposed in the center. Let me just say this isn't exactly correct, and things have changed a bit with digital. Correct exposure has nothing to do with the exposure meter in your camera. The exposure meter is simply a tool to use for you to evaluate how the image will be exposed. Correct exposure is exposing the film or digital sensor exactly the way you want to expose it. In the digital world you can get more information in your RAW file if you expose to the right and adjust later in Photoshop. Don't blow out the highlights, unless you intend on blowing them out. You can see if the highlights are blown out by the flashing alert on most camera preview screens.


The goal here is to know exactly what you are capturing leaving nothing to chance. Once you gain a level of control over your camera and exposure where you know what will happen you have succeeded in controlling exposure. Sure you might bracket your exposure, you might take a number of different photographs from different angles, after all we are dealing with nature and often times if you wait a few minutes something happens and things get better. But once you can control the camera you have reached a new level of proficiency to build upon. Reaching this proficiency allows you to take advantage of new oportunities and to begin learning other new things.

Sunday, July 1, 2007

Welcome to the Photography Field Guide


Poison Dart Frog on Leaf, Dendrobates auratus
Corcovado National Park, Costa Rica 2005


Welcome to the Photography Field Guide. Here we will discuss and learn the techniques used to photograph nature with in-depth instructions on technical matters and useful advice and discussions that will help any photographer realize their creative potential.

I will guide you through shooting landscapes, wildlife portraits, close-ups, choosing equipment, locations, printmaking, business, equipment reviews and more. Everything a nature photographer does will be covered. There will be articles for all aspects of the trade. From beginners to professionals, from students to amateurs. We will have something for nearly every photographer.

So sit back, check back often, support the site and get ready to learn how to take better pictures of this beautiful planet.

The green and black poison dart frog is found on the floor of rain forests. They are difficult to see however they make a chirp that is very noticeable. I took this photograph of a poison dart frog on a leaf on my visit to Costa Rica’s Corcovado National Park. I was lying in the mud of the jungle floor looking up into a giant leaf and way up above there was a small opening in the jungle canopy providing enough light to backlight a Poison Dart Frog. -Chris Bensen